How to Color Grade Your Music Video
Published April 24, 2026
LUTs, B&W film presets, and cinematic looks — applied per clip or across the whole video. No terminal, no plugins, no subscription.
Color is the mood of a music video. The same performance shot can feel warm and intimate, cold and cinematic, or raw and gritty depending on how it's graded. FFmpeg Commander gives you two distinct ways to apply color grades — each suited to a different point in your workflow.
Two Ways to Grade — Know Which to Use
Per-Clip Grading
Apply a different LUT or B&W preset to each individual clip. One clip can be Teal & Orange, the next can be Kodak Tri-X. The grade is stored as metadata alongside each clip and baked in at export time — your source files are never touched. Best for music videos with varied footage or intentional contrast between scenes.
Whole-Video Grading
Apply a color grade or B&W pass across the entire video — or drag a region handle to cover only a specific section. Pre-rendered in real time via GStreamer so you see the result immediately. Best for a consistent look across the whole video, or for dramatic moments where the grade changes mid-song.
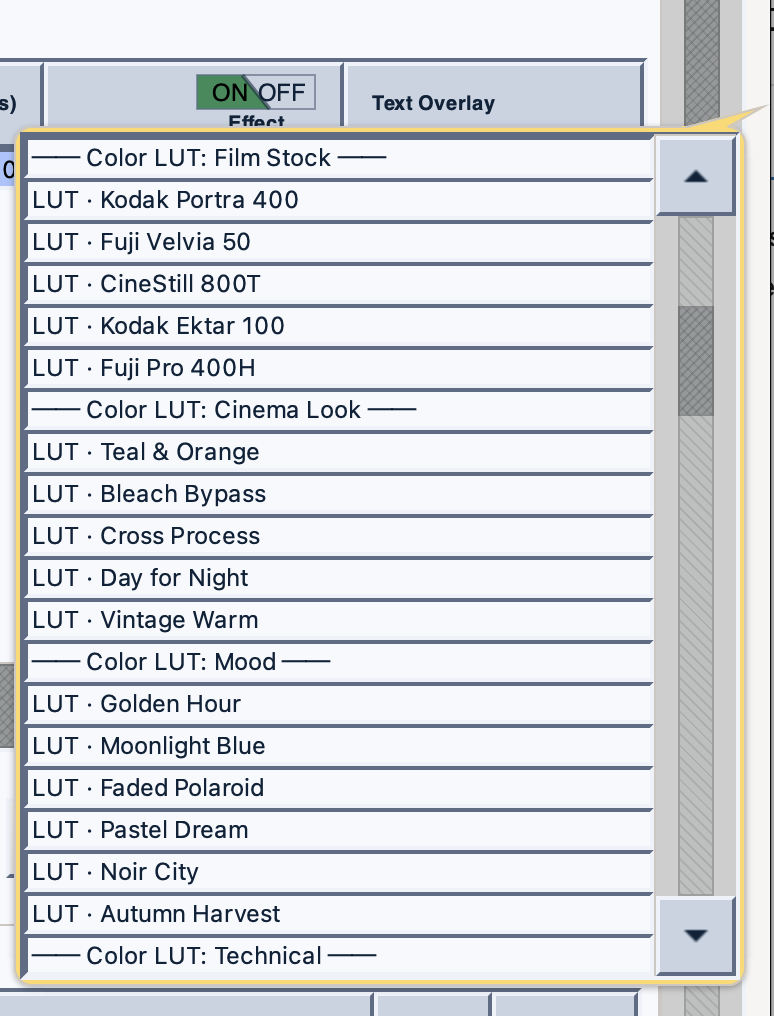
The LUT and B&W Preset Library
Both tools draw from the same library of built-in presets. Every preset is a real LUT or film emulation — not a simplified filter. Here's what's included:
- Kodak Double-X 5222
- Kodak Tri-X 7266
- ORWO UN54
- ORWO N74
- Ilford HP5+ 400
- Kodak T-MAX 400
- Ilford Pan F Plus 50
- Ilford Delta 3200
- Kodak Portra 400
- Fuji Velvia 50
- CineStill 800T
- Kodak Ektar 100
- Fuji Pro 400H
- Teal & Orange
- Bleach Bypass
- Cross Process
- Day for Night
- Monochrome Mood Pass
- Color Drain (timed B&W island)
- Warm Contrast Bump
- All LUTs above, timed to regions
Method 1 — Per-Clip Grading in the Holding Bin
Use this when different clips in your music video should have different looks — for example, live performance footage in B&W and behind-the-scenes footage in warm color.
- Open Holding Bin & Timeline Assembly from the main interface.
- Add your clips using Add New Clip and arrange them in the Timeline on the right.
- In the Timeline, find the Effect column for each clip. Click the dropdown.
- Choose your grade — a B&W film stock, a color LUT, or none. Each clip is set independently.
- Repeat for each clip. Mix and match freely — one clip can be Ilford HP5+, the next can be Teal & Orange.
- When you're happy, click Export Timeline. The grades are baked in during the render. Source files are untouched.
Method 2 — Whole-Video Grading in the Director's Workbench
Use this when you want a consistent cinematic look across the entire video, or when you want a dramatic grade shift at a specific moment in the song — like the drop hitting and the whole video going monochrome.
- Load your clip in the main interface and click Director Workbench.
- The Workbench scans your clip and presents a set of effect suggestions. You can also add effects manually.
- Select Color Grade (LUT) to apply a full-video cinematic look, or Monochrome Mood Pass for a B&W film stock treatment.
- Drag the region handles on the timeline to cover the section you want graded — the full video, or just a portion.
- The effect pre-renders immediately. Watch it play back in real time through the built-in player — what you see is what you get.
- Stack additional effects on top if needed — a Warm Contrast Bump under a LUT, or a Color Drain effect timed to a specific moment.
- Render when ready.
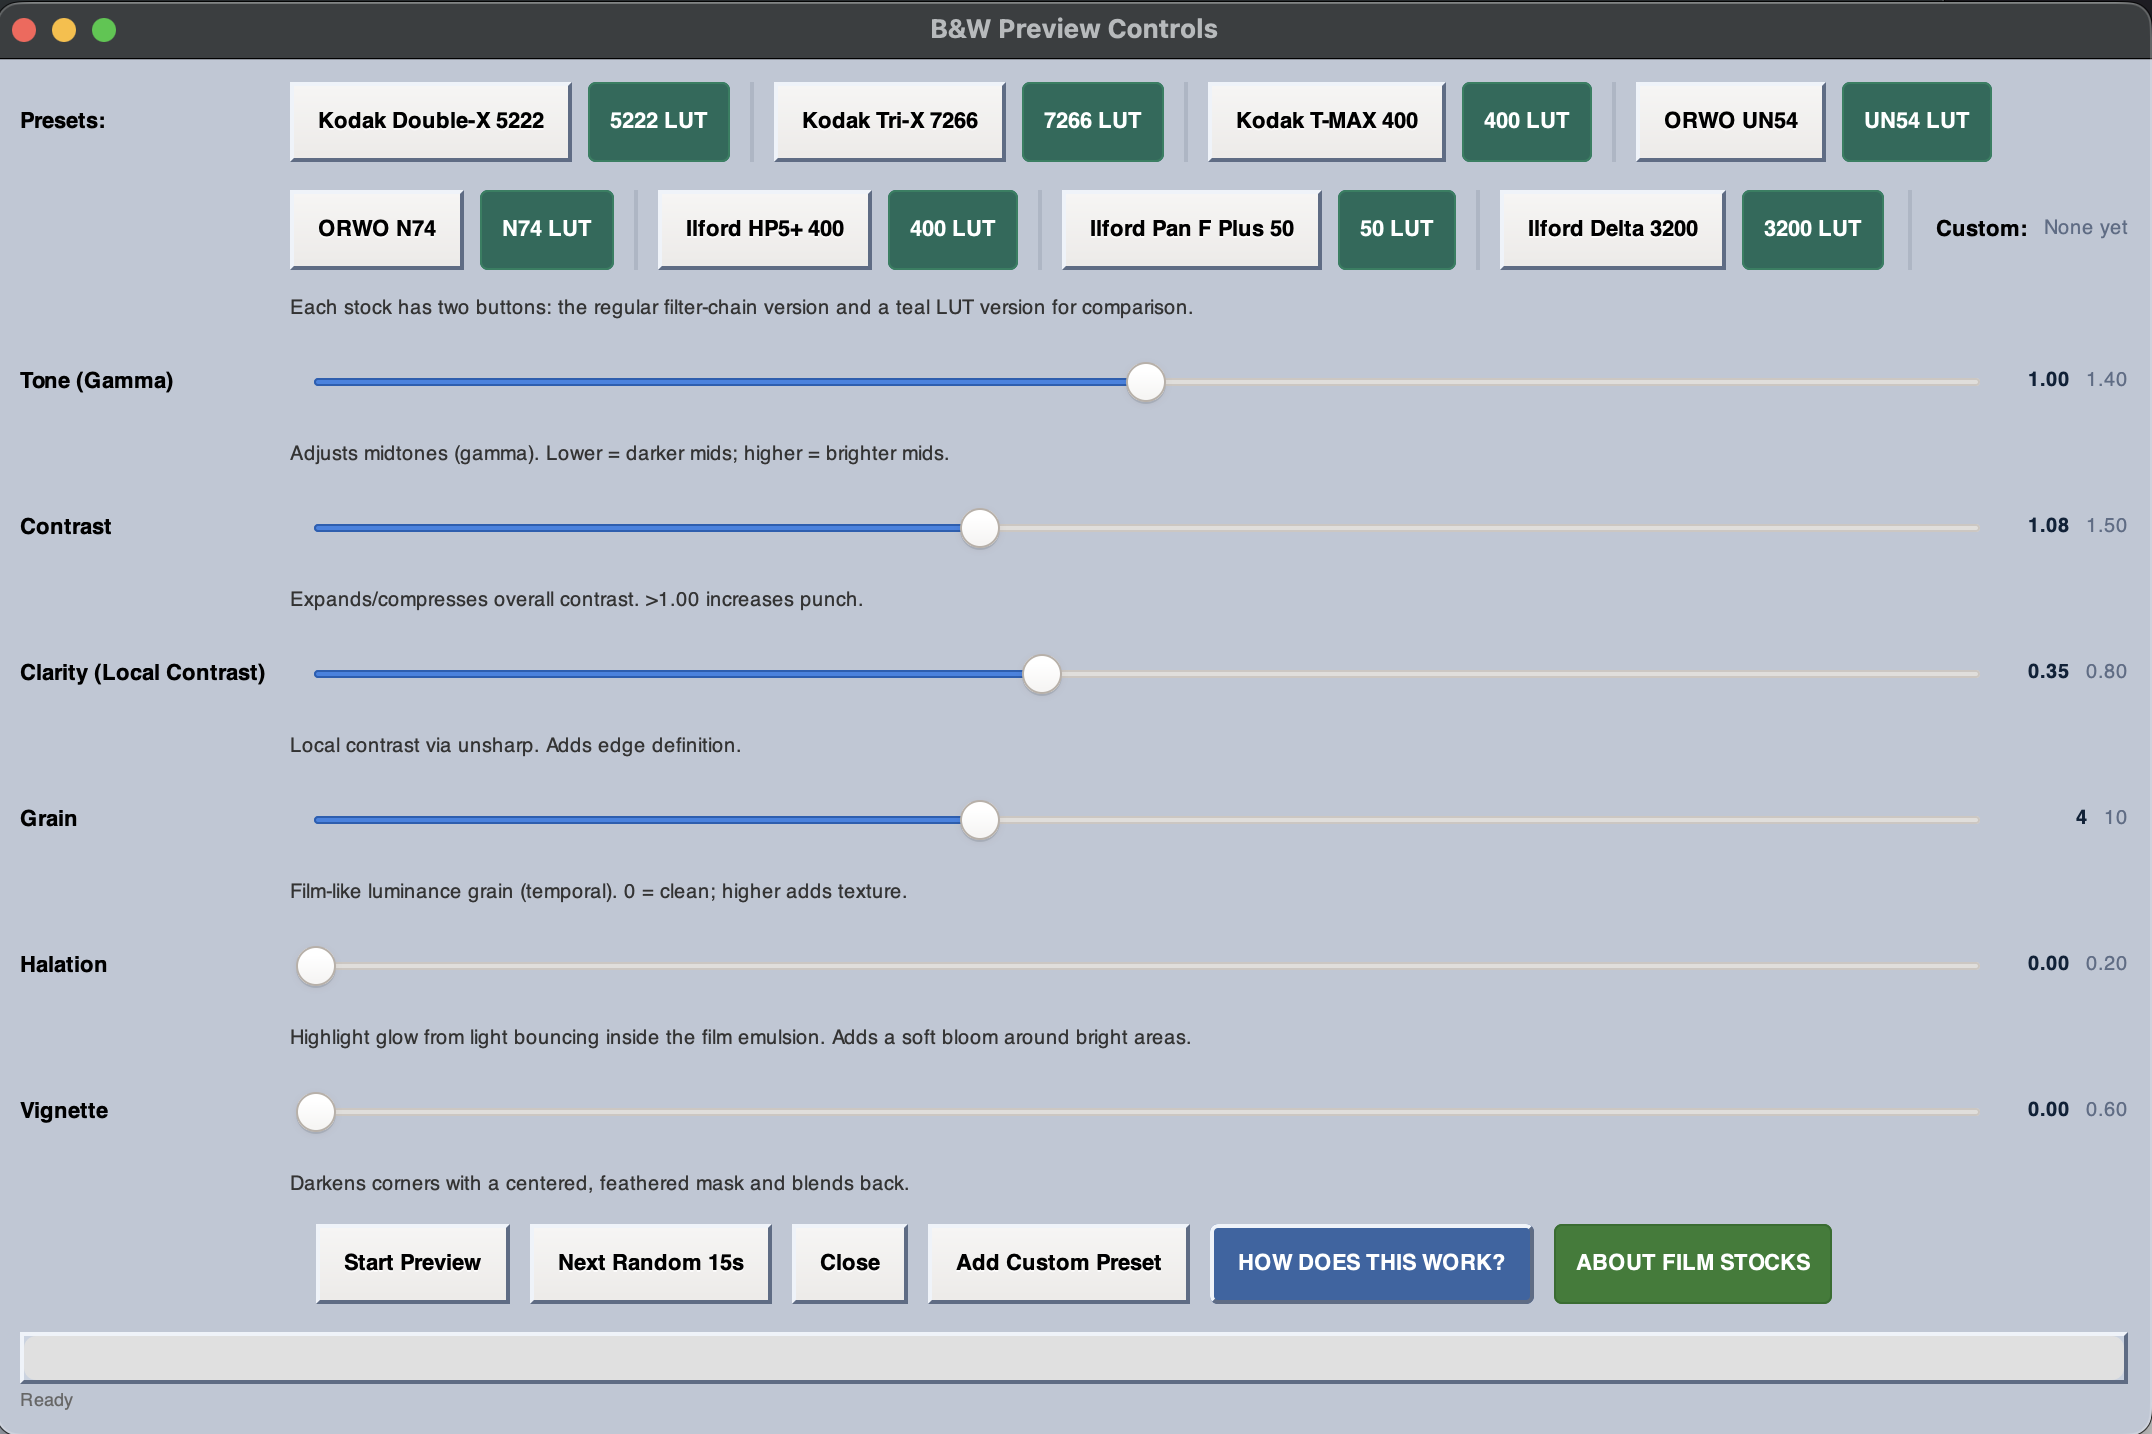
The Color Drain Effect — Made for Music Videos
The Director's Workbench includes a unique effect called Color Drain that was practically designed for music video moments. The video plays in full color, then at a point you choose it transitions to a B&W film stock look, holds it, then transitions back to color.
Transition styles include Smooth Fade, Hard Cut, Flash, Sawtooth, and Slow Burn. You control the timing by dragging region handles directly on the player timeline.
Think: verse in color, chorus drops into B&W, verse comes back in color. That's one effect, no compositing required.
Which Method Should You Use?
A quick way to think about it:
- Different clips, different looks → Holding Bin per-clip grading
- One consistent look for the whole video → Director's Workbench Color Grade LUT
- Dramatic B&W moment timed to the music → Director's Workbench Color Drain
- Full B&W film stock treatment → Either — Holding Bin for per-clip, Workbench Monochrome Mood Pass for whole video
Both approaches produce the same quality output — full LUT-based processing applied by FFmpeg during render. Nothing is simplified or approximated.
Ready to try it? FFmpeg Commander includes these color grading tools and much more — one-time purchase, no subscription.
Get FFmpeg Commander — $69 →See also: Why Black and White Can Make a Film Feel Better — Holding Bin vs. Workbench: Two Editing Workflows
FFmpeg Commander Video Toolbox — 2026