Screen Capture for Mac Free
A simple screen recorder that runs entirely on your Mac. Record your screen with your voice, save it as an MP4, done.
FFmpeg is the engine.
GTK3, SoX & BlackHole build the recorder.
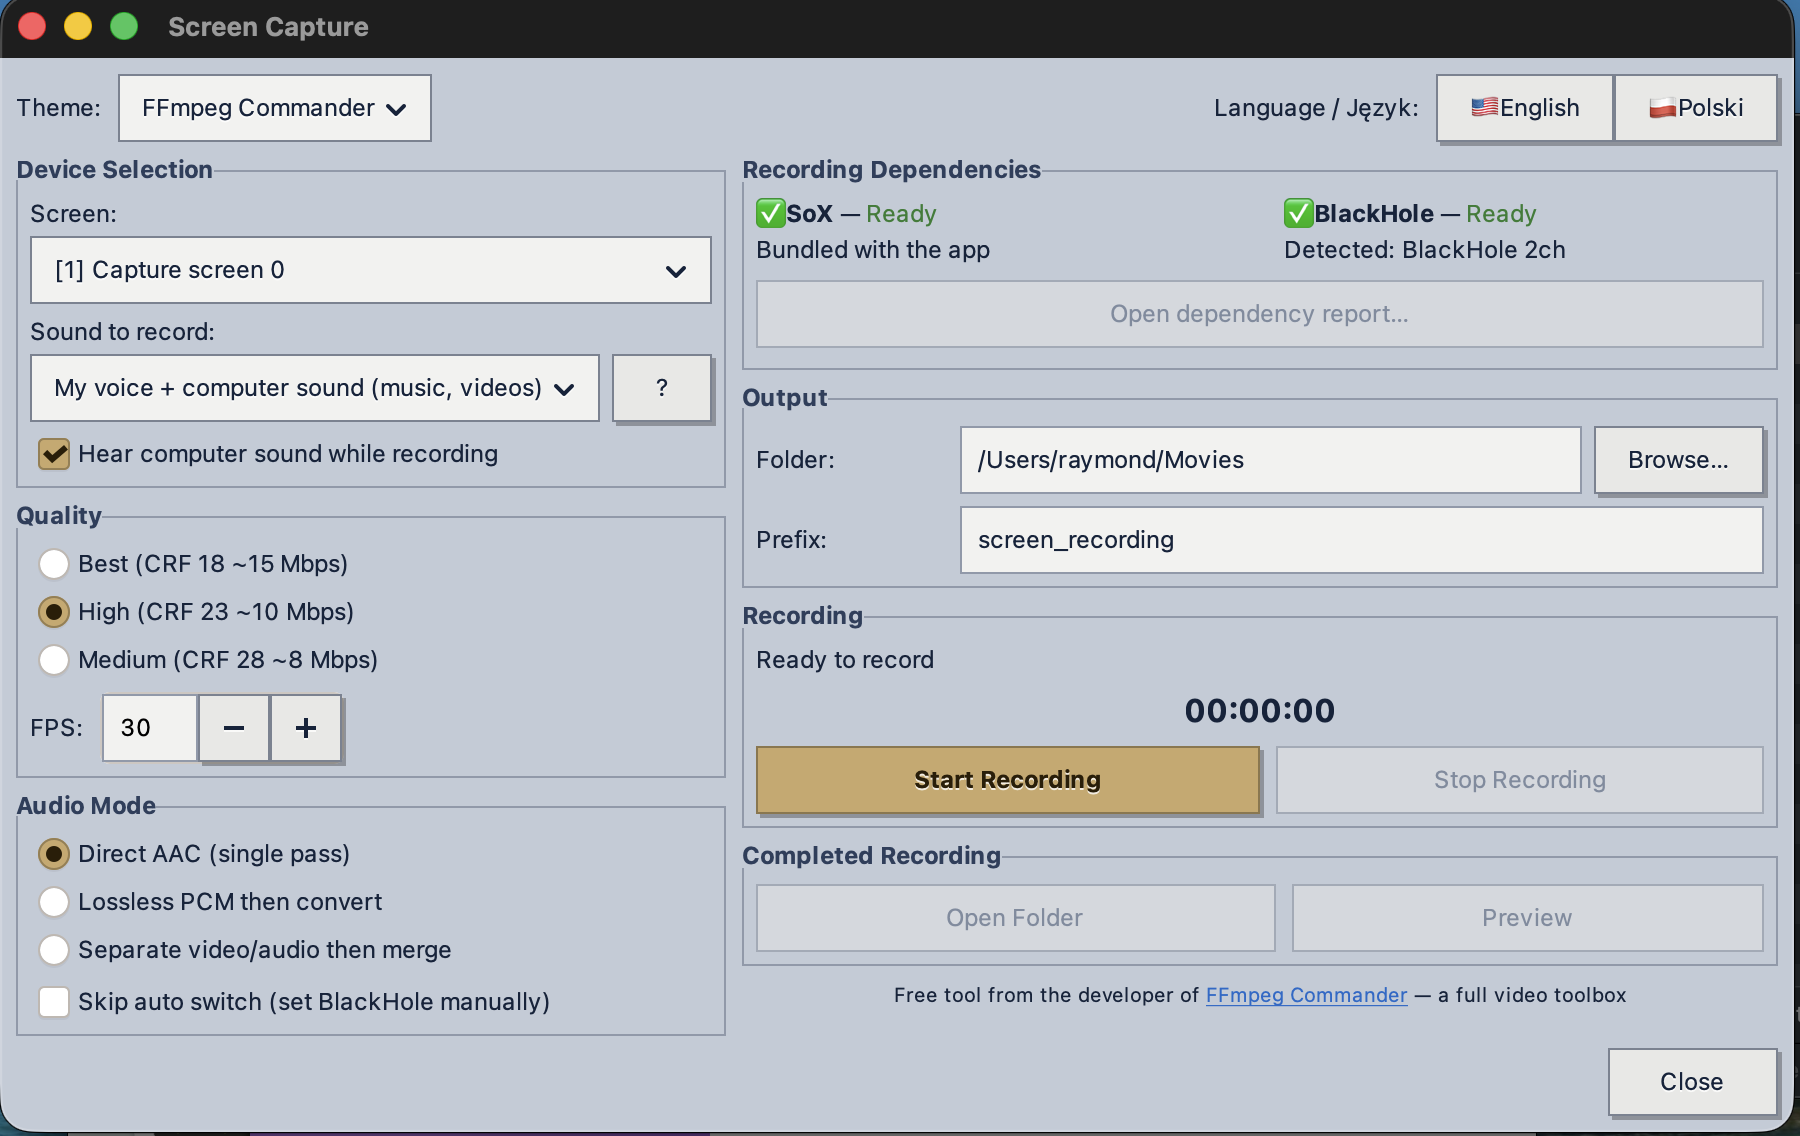
A native GTK3 interface drives FFmpeg for capture, SoX for audio handling, and BlackHole to route your system sound — screen + voice + computer audio, one recording.
FFmpeg is the engine. GTK3, SoX & BlackHole build the recorder.
Screen + voice + computer audio, mixed into one recording — 100% local.
See it in action
This demo was recorded with the app itself — you're watching Screen Capture do its own product video.
What it does
Pick your screen, pick what sound to record, press Start Recording. When you press Stop, the finished MP4 is sitting in your Movies folder and the Preview button lights up to play it back.
- Record your voice and the computer's sound together — narrate over a YouTube video, a game, or a call, and both end up mixed in one file. Most free recorders make you pick one or the other.
- Or just one of them — plain-language choices: voice only, computer sound only, or both. No audio-device jargon to decode.
- Hear it while you record — live monitoring keeps the sound playing through your speakers during the recording, like OBS does.
- Full Retina resolution — captures your screen at its native pixel density, so text and UI stay razor sharp instead of turning to mush.
- Three quality presets plus an FPS control, encoded in hardware with the Apple VideoToolbox H.264 encoder, so recording stays light on your CPU.
- Everything stays local. Recordings are written straight to a folder you choose. Nothing touches the network.
It comes from the same workshop as FFmpeg Commander, my paid video toolbox. Screen recording used to be a feature inside it, but it deserved to be its own small, free tool. So here it is.
Made for how-to and tutorial videos
The whole reason this app mixes your voice with the computer's sound and records at full Retina sharpness is so the person watching can actually read the screen and hear you explain it. That is exactly what a good walkthrough needs, which makes it a natural fit for:
- IT and support — record a fix once, with narration, and send the video instead of typing the same steps into every ticket.
- Teaching and training — software lessons, onboarding, and internal how-tos where the menus and text have to stay legible.
- Tutorial and course creators — clean, sharp captures with your voice, and no OBS scene setup to fight with.
- Explaining something to a friend or relative — show them how to do the thing once, on video, instead of over the phone three times.
The sharp text is the point. A how-to is useless if the viewer can't read the button you're telling them to click, and that is exactly where scaled-down recorders fall apart.
Doesn't the Mac already have a screen recorder?
It does — Cmd+Shift+5 and QuickTime. And here's their catch: they can't record the computer's sound. Try recording a YouTube video or a game with the built-in tool and play it back — the picture is there, the audio isn't. Apple's recorder only captures the microphone.
That gap is exactly what this app fills. Record the computer's sound, your voice, or both mixed together in one file — the thing the built-in recorder has never done. If all you need is silent video of your screen, honestly, Cmd+Shift+5 is fine. The moment sound matters, you need something more.
Why recordings look sharper than OBS out of the box
If you've recorded your Mac's screen with OBS Studio and wondered why the text looks soft no matter what you tweak, here's the usual reason: OBS defaults to a 1920x1080 canvas. On a Retina Mac that means your screen gets scaled down before it's ever encoded, and scaled-down text is exactly what makes screen recordings look blurry.
Screen Capture records at your display's native Retina resolution, and its quality presets use bitrates picked for screen content, not streaming budgets. Full-resolution source plus enough bitrate is the whole trick. OBS can be configured to do the same if you know which settings to dig for — this app just does it by default, with nothing to configure.
It's light, too. There's no compositing canvas and no plugin runtime — the capture goes straight into Apple's hardware encoder, and the optional live preview adds only about 7% of one CPU core (switch it off and even that goes away). In our testing, recording a full Retina display at 30 fps with both audio tracks used about a quarter of one CPU core on an Apple Silicon MacBook Air. The whole app is a 50 MB download.
OBS is a fantastic tool for streaming and multi-source production. If all you want is a clean, sharp recording of your screen and your voice, that's the job this app was built for.
Installing it
The app is fully self-contained. FFmpeg, the audio tools, everything it needs is packed inside the single app bundle. There is no installer and no extra downloads for the standard setup.
- Download the ZIP above and double-click it to unpack Screen Capture.app.
- Drag the app to your Applications folder (or run it from anywhere, it doesn't care).
- Double-click to open it. That's it.
Removing it
Just as simple. Screen Capture is a single self-contained app, so removing it is dragging Screen Capture.app to the Trash. Your recordings live in your Movies folder and stay right where they are — they're yours to keep.
Two optional bits of tidying if you want a completely clean slate:
- If you installed the BlackHole audio driver through the app and don't use it with anything else, remove it separately with BlackHole's uninstaller. It's a system audio driver, so dragging the app to the Trash doesn't remove it.
- Delete the folder
~/Library/Application Support/ScreenCaptureto clear the small file that remembers your language and theme.
The permissions macOS will ask for
Screen recording is one of the most protected things an app can do on a Mac, so macOS makes you approve it explicitly. This is normal and it happens with every screen recorder, OBS and Zoom included.
Screen Recording permission
- The first time you press Start Recording, macOS shows a prompt saying the app would like to record the screen. Click Open System Settings.
- In Privacy & Security → Screen & System Audio Recording, turn on the toggle next to Screen Capture.
- Quit the app completely and open it again. macOS only applies this permission on the next launch. This is the step everyone misses.
Microphone permission
When you record with your voice, macOS asks for microphone access with a simple Allow button. Click Allow and you're set. This one works immediately, no relaunch needed.
Recording system audio Optional
Out of the box the app records your screen and your voice. If you also want to capture the sound your Mac itself is playing, that takes one extra free piece: BlackHole, a virtual audio driver. macOS does not let any app tap the system's audio output directly, so every screen recorder that captures system sound uses a driver like this one.
- Download the free BlackHole 2ch installer from existential.audio/blackhole and run it. It needs your admin password because it installs a system audio driver.
- Open Screen Capture and pick BlackHole 2ch in the Audio dropdown.
- Record. The app routes your Mac's sound through BlackHole automatically while recording and switches your speakers back when you stop. You don't have to touch your sound settings at all.
The app's dependency panel shows whether BlackHole is detected, and the ? button next to the Audio dropdown repeats these instructions right inside the app.
Under the hood: FFmpeg
The recording engine inside this app is FFmpeg — the open-source workhorse that powers video processing across the entire industry, from streaming services to broadcast. It's bundled inside the app, so there's nothing extra to install; you just get an engine with two decades of hardening behind it doing the capture and encoding.
It's also the same engine behind FFmpeg Commander, my full video toolbox. This recorder uses a small slice of what FFmpeg can do — the big tool opens up the rest: converting, compressing, subtitling, downloading, all of it.
Requirements
- A Mac with Apple Silicon (M1 or newer)
- A recent version of macOS
- About 150 MB of disk space for the app
Recordings default to your Movies folder and you can point them anywhere you like.
Want to edit what you recorded?
Screen Capture records. It doesn't trim, convert, compress, add music, or burn in subtitles, and it never will. That job belongs to FFmpeg Commander, the full video toolbox this app was born from.
Recorded a how-to? Cut out the dead air, burn in subtitles so it's clear even on mute, transcribe the narration with Whisper AI, and compress it to a size that emails or uploads easily. All on your own machine, no cloud. See what FFmpeg Commander does →
Screen Capture for Linux Beta
The same idea, built for Linux: GTK4 interface, FFmpeg 9 for capture, records your voice and system sound together. Newer than the Mac version and still rough around the edges in places — that's what Beta means here.

See it in action on Linux
Real capture on a real Linux machine, x11grab and all — proof it actually works, not just a claim.
The system difference: you need a real X11 session, not just XWayland
This is the one thing that decides whether this app works on your machine at all. The screen-capture engine is FFmpeg's x11grab input — it needs a genuine X11/Xorg session to capture from. It does not, and cannot, capture a Wayland session, and this is a bigger practical issue than it sounds, because most Linux desktops default to Wayland now (Ubuntu 26.04 included).
Here's the part that trips people up, confirmed by testing this on a real Ubuntu 26.04 Wayland machine: having XWayland installed is not enough, and this is easy to get wrong. XWayland lets old X11 applications run as individual windows inside a Wayland session — it does not hand x11grab a copy of your whole desktop to capture. Wayland's compositor deliberately does not expose the full screen to X11 clients that way; that's a security boundary, not a bug. So you can have XWayland fully installed and running and x11grab still has nothing usable to capture.
echo $XDG_SESSION_TYPE. It needs to print x11, not wayland — and that's true even if XWayland is installed. If it prints wayland:
Some systems show a gear/settings icon at the login screen with a “Ubuntu on Xorg” (or “GNOME on Xorg”) option — if you see it, try that first, it's the lightest fix. But on a real Ubuntu 26.04 Wayland install, that wasn't reliable. What's actually confirmed working:
- Install a real X11-native desktop environment alongside your existing one:
sudo apt install xubuntu-desktop(Xfce). It's a bigger download than a simple setting toggle, but it's the fix that's actually been tested and works. - If the installer asks which display manager to use as default, keep gdm3.
- Reboot.
- On the login screen, click the gear icon and choose “Xfce” as the session.
- Log in, then re-check
echo $XDG_SESSION_TYPE— it should now sayx11.
x11grab is working, right in the window.
Installing it
No package manager, no root password, nothing installed system-wide. Everything the app needs — FFmpeg 9, the GTK4 runtime, GStreamer, and the PulseAudio/PipeWire client libraries — is bundled inside the download. That's also why it's a bigger download than the Mac version: on Mac, macOS already provides the frameworks the app leans on; Linux desktops vary too much distro to distro to assume any of that is there, so this build brings its own copy of everything.
- Download the
.tar.gzabove. - Extract it:
tar -xzf LinuxScreenRecorder_*.tar.gz cdinto the folder it extracts, then run./run.sh(make it executable first if needed:chmod +x run.sh).
That's the whole install. Delete the extracted folder to remove it — nothing else was touched on your system.
Requirements
- x86_64 Linux (not ARM)
- A real X11/Xorg session — not Wayland, and having XWayland installed doesn't change that. On Ubuntu 26.04's default setup, that means installing Xfce (see above) — plan on that extra step.
- About 303 MB of disk space for the extracted app
- PulseAudio or PipeWire, for recording your microphone or system sound — standard on effectively every modern desktop Linux distribution
Recordings default to a folder you choose (shown as ~/Videos in testing) and you can point them anywhere.
Under the hood: FFmpeg
Same engine as the Mac version — FFmpeg, bundled inside so there's nothing extra to install. On Linux it's driven through x11grab for the screen and PulseAudio/PipeWire for audio, instead of the Mac's AVFoundation + VideoToolbox path.